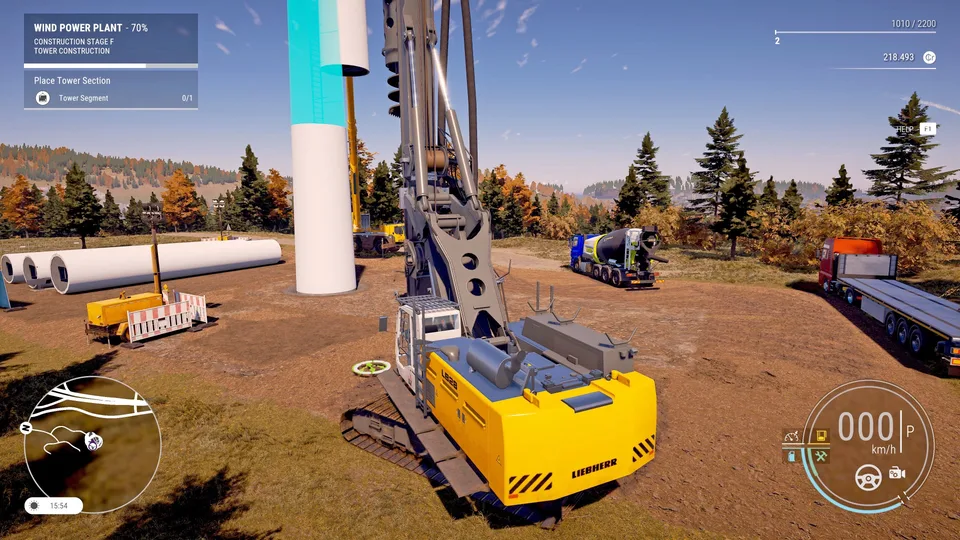
Construction Simulator Garage Expansion Guide: Tips & Tactics
Master the Construction Simulator garage expansion contract with this expert guide. Discover step-by-step tips, equipment needs, and efficiency strategies.
Published: Construction Simulator Wiki Editorial Team
Table of Contents
Building your logistics empire in Construction Simulator is a journey of scaling from small tasks to massive infrastructure projects. One of the most critical milestones for any player is completing the Construction Simulator garage expansion contract. This task is more than just a job; it is a gateway to upgrading your company’s capabilities and unlocking higher-tier opportunities in the city.
In this guide, we dive deep into the requirements, the necessary equipment, and the operational flow you need to master this pivotal project. Whether you are struggling with crane precision or wondering which vehicles to rent, we provide the insights you need to succeed.
Understanding the Garage Expansion Requirements
Before you can tackle the expansion, you must ensure your company meets the baseline criteria set by the campaign. According to player experiences, this contract is not just about showing up; it is about preparation. You cannot simply drive to the site and start pouring concrete.
To initiate the project successfully, you must satisfy these conditions:
Company Premises Ownership: You must own the specific company premises indicated by the contract.
Machine Fleet Requirements: The game requires you to own at least three construction machines to qualify for this contract.
Contract Activation: Always ensure the "Garage Addition" is marked as your active job in the contracts menu to prevent material delivery errors.
Requirement
Importance
Action
Own Premises
Critical
Purchase via Company Fleet menu
3 Machines
Essential
Buy or lease basic utility units
Active Job
Gameplay flow
Select in the Jobs menu
Essential Equipment and Vehicle Strategy
The Construction Simulator garage expansion requires a specific set of tools to handle everything from heavy prefab walls to foundation pouring. If you are just starting out, managing your budget is key. While purchasing every machine is ideal, early-game players should utilize the rental system to optimize cash flow.
Recommended Loadout
For this contract, you will need a combination of transport and heavy-duty machinery. Based on community reports, here are the most efficient choices:
Lorry with Crane: Essential for transporting materials and offloading components directly at the site.
Flatbed Trailer: Necessary for securing large, prefabricated wall elements.
Tower Crane (Liebherr L1-24 or similar): Required for the precision placement of wall and roof components.
Concrete Mixer & Pump: Required for the final pouring stage.
Tip
Financial Efficiency
Renting equipment is recommended if you are low on funds. Always return your equipment via the vehicle fleet menu immediately after finishing a stage to avoid unnecessary hourly rental fees.
Step-by-Step Construction Workflow
Execution is everything in this game. The project is split into distinct phases, each requiring careful coordination. Following this sequence will ensure you don't waste time or money.
Phase 1: Material Procurement
You need to visit the prefabricated wall factory. After marking the job as active, pull your trailer into the designated delivery zone. Once the walls are loaded, stop by the building material dealer for the remaining items like rebar mesh and ceiling components.
Phase 2: Structural Assembly
Using a crane is the most challenging part of the Construction Simulator garage expansion. You must park your crane within the designated "crane area." Use the camera views—specifically the top-down or focused views—to align your load precisely.
Rotation: Use left shift and arrow keys to rotate components.
Precision: Take it slow. Moving too quickly increases the "dangling" effect of the crane hook, making placement difficult.
Task
Equipment Needed
Skill Focus
Wall Placement
Lorry/Crane
Spatial Alignment
Rebar Installation
Tower Crane
Precision Lowering
Concrete Pouring
Concrete Pump
Flow Control
Managing Concrete Pours and Final Tasks
The final act of the expansion involves pouring concrete to stabilize the new structure. This is where many players encounter bugs or workflow issues. To avoid frustration, follow these steps:
Preparation: Move your concrete pump close to the site. Ensure the mixer can back up to the pump's hopper.
Feeding: Open the hopper lid by pressing the interaction key (default G). Flow the concrete steadily from the mixer into the pump.
Pouring: Switch the pump to "Function Mode" to unfold the boom. Pour carefully within the marked blue holograms.
Warning
Common Error: Over-pouring
Avoid dumping all the concrete in one spot. Move the boom slowly across the target area to ensure even distribution. Failing to do this may force a reset of the mission.
Why This Contract Matters for Your Career
The Construction Simulator garage expansion isn't just about completing a building; it is about unlocking the game's broader systems. Successfully finishing this contract awards you the capital needed to invest in more specialized machinery, such as wheel loaders or excavators.
Many players note that this mission acts as a "skill check." If you can master the crane control and the logistics of material transport here, you are well-prepared for the massive airfield and stadium expansions that come in later stages.
Q: Can I use any crane for the Construction Simulator garage expansion?
A: Yes, but smaller tower cranes like the L1-24 are more cost-effective for this specific project. Ensure it has enough reach for the site's dimensions.
Q: Why is my mission not progressing after placing the walls?
A: Check if you have cleared all debris from the construction site first. If the area isn't clean, the game won't trigger the next structural phase.
Q: Is there a way to avoid driving long distances for materials?
A: You can use the "Fast Travel" feature, though be mindful that it usually incurs a fee. Alternatively, optimize your routes by bundling multiple material pickups into one trip.
Q: How do I handle multiple contracts at once?
A: You can accept several jobs, but always ensure the specific contract you are working on is "Active" in the menu. This ensures the game correctly flags the material loads for that specific project.